Eloqua comes with a great out-of-the-box subscription management option. In fact, the majority of new Eloqua customers choose one of the default Subscription Management options. However, over time, your needs may change and if you want to gather more information from your subscribers or provide a better branded subscription management Landing Page, creating a custom preference center is your best option. This article will guide you through some of the technical aspects of a custom preference center.
What is a Custom Preference Center?
A custom preference center solution includes a custom Eloqua Landing Page and Form with a few unique configurations using Eloqua’s data lookup scripts to keep the subscribe and unsubscribe process intact. The advantages of this is you have more control over the content you would like to display and overall functionality of the page. A custom solution will replace your current subscription management process. In this blog post, I’ll walk you through key considerations when choosing to build a custom preference center using email groups, how to build a custom preference center in Eloqua using data lookups, and provide examples of custom solutions that Tegrita has configured. It is also possible to build a custom preference center without email groups and doing so offers greater flexibility, but… it also comes with some risks. I will write more about that next time. In this article, I will focus solely on preference centers using email groups.
Key Considerations When Choosing to Build a Custom Preference Solution
1. What options are you currently giving your subscribers?
If you currently only offer a Global Unsubscribe, transitioning to a custom solution is easy. However, if your subscribers have already indicated their preferences, you should take extra precaution in your solution to ensure the old and new options align.
2. How will Contacts access the new preference center?
There are two ways in which you can tackle this: 1) use it as a Landing Page that is solely accessible through the Eloqua Email Footer, or 2) Link to the page directly from your website as a subscription page.
3. Is there a need to have multiple preference pages?
Many companies market to multiple audiences. The types of communications sent to each audience is different and will require different solutions. For example, multiple brands, different countries, or even customer communications verses prospect communications are all reasons why multiple solutions may be advantageous.
4. What information do you want to collect? Segmentation is the “brain” of the system, but without data, your options for Segmentation and personalization are limited. Using the preference page to obtain complete and current data is a simple way to expand your data set and keep your data fresh.
5. How will you communicate to new subscribers?
Although more related to your marketing efforts than the preference center itself, going through the process of developing a custom preference center gives you the opportunity to have automated welcome communications so that new subscribers immediately build a connection with your brand.
Building your Custom Preference Centre
User Flow
As mentioned in the key considerations, there are several user flows you can have with preference centers. The recommended flow is to have the preference center only accessible via the email footer as this minimizes the chances of bots stealing and inputting data into your database.
In the example, subscribers will visit the custom preference center only through a link in the email footer. This will pre-populate the subscriber’s information based on the email address.
Create the form to update Email groups preferences
First, you need to create a form in Eloqua. This form design must include (at the very least) two things:
1. Email address input
2. Email group(s) inputs
For the email group form fields, you can use any type of form fields you prefer, such as checkboxes, or radio buttons. Eloqua’s default subscription management page uses checkboxes, however as a best practice we suggest using radio buttons because they are clearly labelled as subscribed or unsubscribed. If you prefer using checkboxes, I recommend using a field description since they don’t have labels.
In the Form processing steps, include the following step for each email group you are using on your Landing Page:
• Email Group – Subscribe/Unsubscribe
You need to configure the processing steps to subscribe or unsubscribe the user to an email group based on what they choose:
1. Set the “Subscribe/Unsubscribe” setting in the “Email Group – Subscribe/Unsubscribe” processing step as “Form Field”
2. Choose the respective form field email group input.
Take a look at this example:

This configuration indicates to Eloqua to map the “Email Group” subscription preference to the “Form Field” input value. If the user chooses to subscribe, the form submits a value of “on” indicating that the Email Group is also “on” or “subscribed” and vice versa. This is a little trick to avoid adding two processing steps for each email group (subscribe and unsubscribe), and it also avoids the need to use conditionals statements.
Adding pre-population to the Landing Page
When you create a Landing Page, there are several things you need to keep in mind. In the processing steps, you can add some functionality to take Contacts to an unsubscribe survey if they choose to unsubscribe. Another feature you can control is to create a subscriber “profile”. We have built this type of solution for several professional sports teams. In the Landing Page, you can simply include form fields to capture the user’s name, date of birth, address, and favorite player.
After you build the Landing Page that fits your business needs, you need to map the Form to the custom Landing Page. To do so, navigate to the Eloqua form settings and copy the Eloqua HTML Form and add that to your custom Landing Page.
The last step is to add the data look ups to the Landing Page. Navigate to the “Web Data Lookup” asset and create a data lookup for “Contact Group Memberships”. If you’re not familiar with this process, click here for more information. The “Contact Group Memberships” look up type will only pull the user’s status for each Email Group you have.
You need to use a jQuery with the Eloqua data lookup scripts to check the email groups status of the user. It is important that you use the “email address” as a unique identifier and pass this email address to the look up. Here is what the code looks like:

I will explain this code a bit to you… let’s assume you have a newsletter that consists of radio buttons with ids of newsletterSubscribe and newsletterUnsubscribe You need to select the newsletter inputs with $(‘#newsletterSubscribe’) and if the data lookup returns true, check the radio button. This is the line of code that does this check:
GetElqGroupMembershipStatus(‘ac4b968c-61e1-4b3f-b9114a15bb3b’)
The key above between the single quotations refers to the email group’s “List Data Lookup Id”.
Putting it all together
Now you have configured the Form, mapped it to your custom Landing Page and added the data lookup for pre-population of the user’s email group statuses. To test the functionality, create an email, and add the Landing Page link in the footer. Send a test, and click on the footer link and the subscriber’s information should be pre-populated.
I dare say… Congratulations you’ve created a custom preference center in Eloqua! Before you open the champagne bottle, I want to share a final bit of information. You should consider gathering consent from your subscribers. For the past few years, governments have been moving towards legislation to protect its citizens from spam. For example, in 2014 Canada implemented Canada’s anti-spam legislation (CASL) that requires businesses to obtain email recipient’s consent. In Europe, the EU General Data Protection Regulation (GDPR) legislation will take effect to unify the requirements across Europe. Many countries have email regulations that also slightly vary and often change. For example, Germany has a double opt-in requirement whereby consent must be obtained in two clear steps. We recommend you seek legal advice based on the countries you market to so you can configure your preference center to conform to these laws. At Tegrita, we offer solutions that can get these conversations started. For more information, contact us today!
Examples of Custom Preference Solutions
At Tegrita, we have built a wide range of custom preference centers for our clients. Below are a few examples in our portfolio to inspire you.
Unsubscribe Survey
We recently built a preference center for a financial client that includes an unsubscribe survey that asked subscribers why they chose to unsubscribe. When the subscriber chooses the “I want to unsubscribe…” checkbox, the dynamic survey on the right will appear and ask why. The data collected helped our client design a better email strategy.
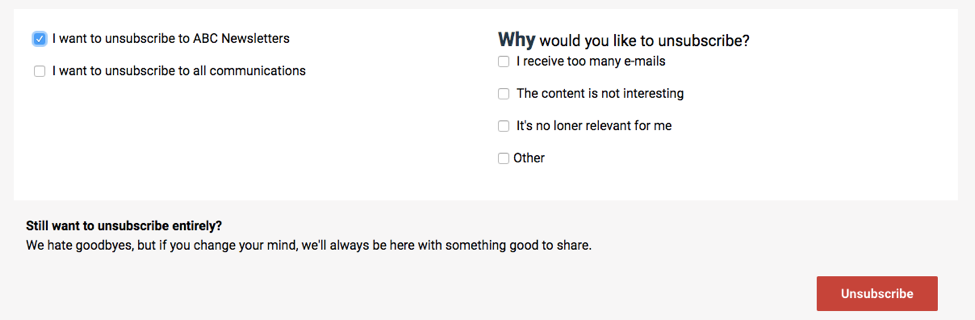
Example of unsubscribe survey
Custom Backend Process for Subscribers
One of the NHL teams that we work with not only created a custom preference center but also a customized backend process to manage their season ticket holder subscriptions. On the custom preference center, they collect contact information, favorite player, and communication preference.
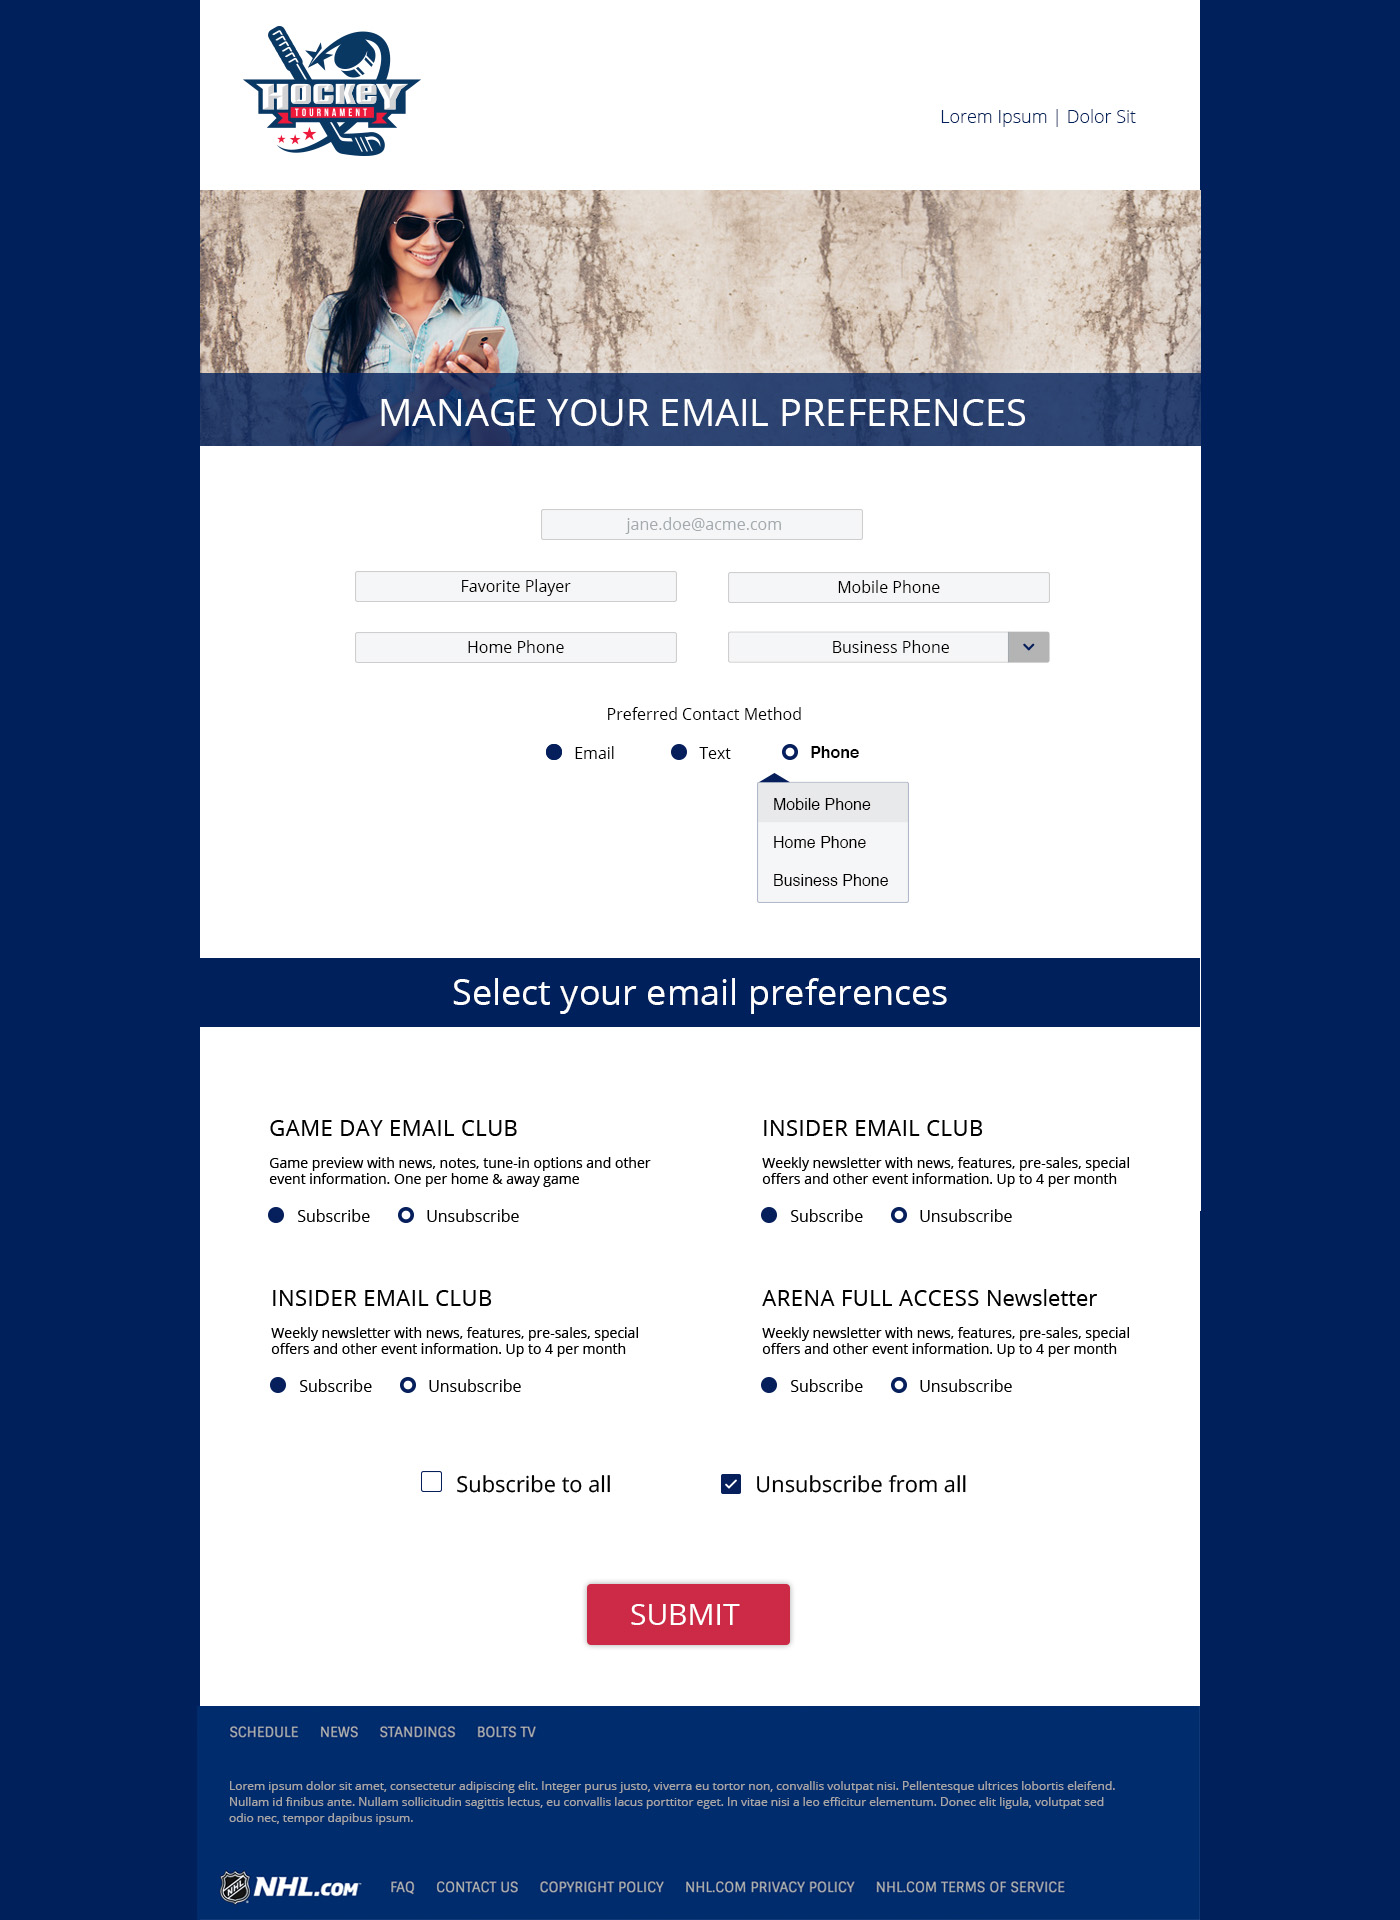
Sample Preference Center
When a Contact purchases a ticket, there are also purchase related email groups used for communications specific to the type of ticket purchased. We configured a program running in the background that looks for new ticket purchases and subscribes them to the appropriate email groups.
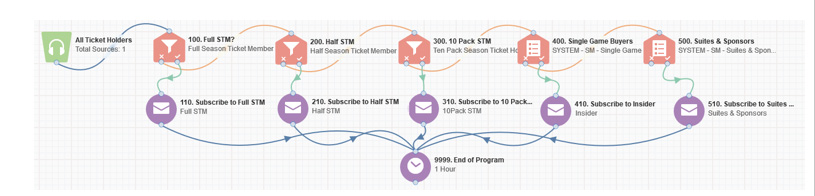
Campaign Flow Diagram
Email Snooze
In some cases, Contacts don’t really want to unsubscribe. They are busy or feel like they are receiving too many communications. Two of our clients chose to include Email Snooze functionality as one of their preference management options. One client has a 90-day snooze as an option on their custom preference pages and the other has the snooze in the footer of the email before a contact clicks to the preference page. Both clients are B2C and in industries that warrant frequent communications.

90-day snooze

Snooze in Footer