Oracle Responsys is a leading marketing automation system that is built around the concept of being able to design complex multi-channel campaigns. This is accomplished using a simple-but-robust “drag and drop” system to place campaign steps on a program canvas. Along with the powerful program entry steps, decision steps and action steps, you will find the often-under-appreciated Timer step.
Timers allow you to separate steps in a campaign by telling the program to “pause” – either for a specified length of time, until a specific date/time, or in advanced cases, until a pre-defined action occurs. Without timers to control a program a series of campaign steps would happen almost instantaneously, resulting in a jumble of events occurring at once. By thoughtfully using timers you can, for example, allow users time to respond to your campaigns, or batch your users into a step so that they are all acted upon at the same time.
Use cases for timers:
- To control campaign cadence
- To allow recipients time to interact/respond
- To allow collection of incoming data
- To allow uploading of data / data synchronization
- To collect users at a step before allowing them to proceed
Traditional Timers
To use a traditional timer:
- Drag the timer icon onto the program canvas.

2. Right-click the icon and select Properties. The Timer Event dialog opens.
3. Select the type from the Select Timer dropdown list:
-
- Target Timer; or
- Elapsed Timer
Target Timers
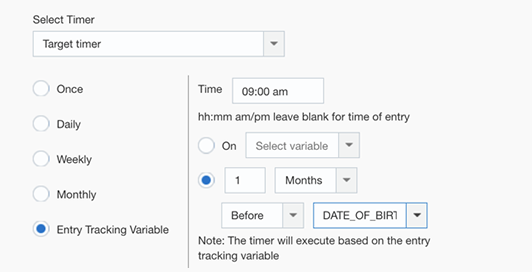
Target Timers wait until a specified future date and time.
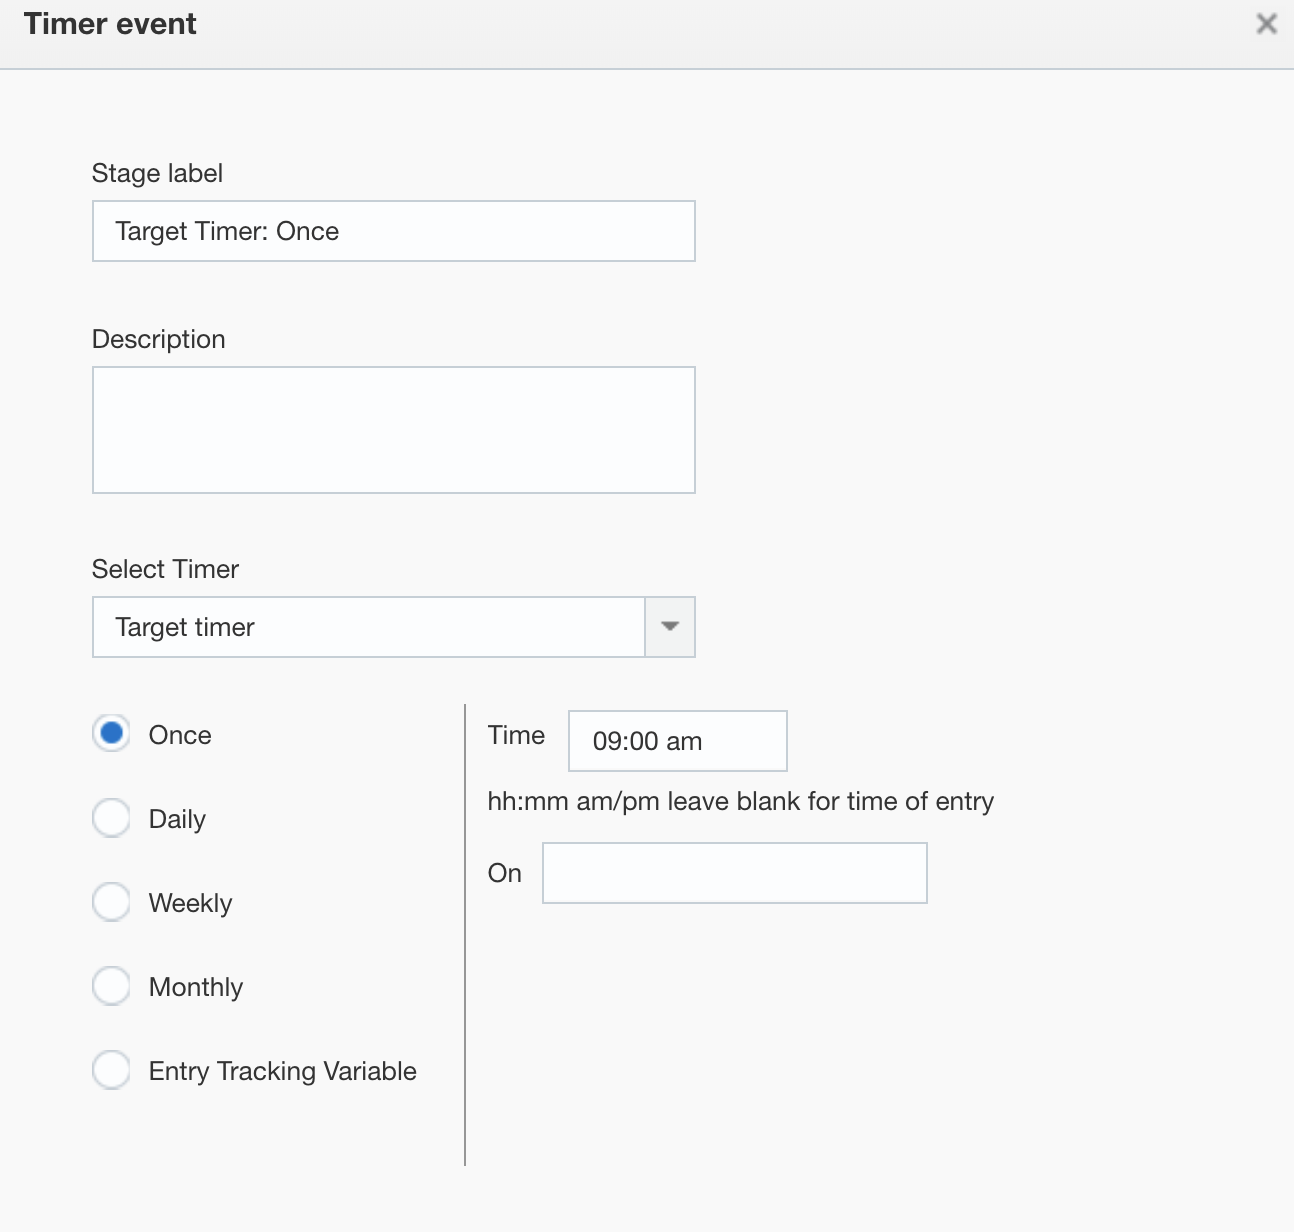
Use the “Time” field to set the time at which the timer runs. Note that this setting is applied to any option you select. For example, let’s say you set the time to be 9am. If you set the target time to run on the first Monday of the month, it will run on the first Monday at 9am. Similarly, if you set a recurring timer to wait 2 days, it will run at 9 am every 2 days.
Next, select the type of Target Timer by selecting the appropriate radio button. Here’s how each type operates:
- Once: Release entries in the timer at a specific date/time.
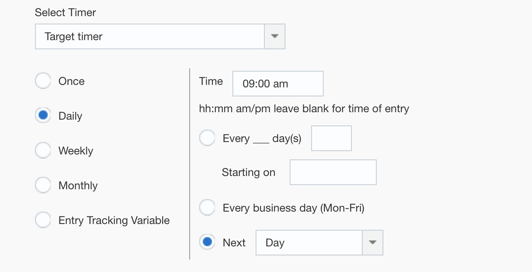
- Daily: Release entries daily at the specified time. You can run every x number of days, only on business days, or the next day by selecting the appropriate option.
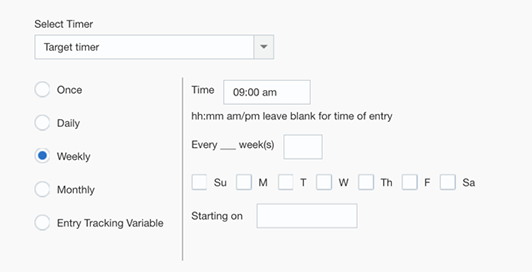
- Weekly: Runs the timer on a weekly basis on the days specified. You can also specify that the timer runs every x number of weeks.
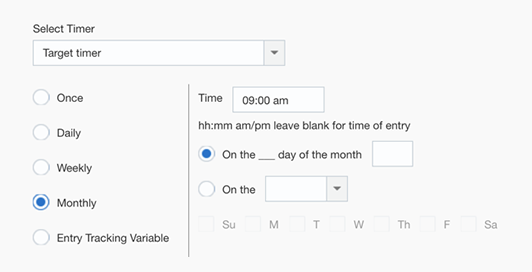
- Monthly: Runs the timer on a specific day of the month. NOTE: You cannot schedule a timer to run on the last day of the month.
- Entry Tracking Variable: Use this to run the timer relative to a specific date field. For example, three days before the customer’s birthday, or a week after the last purchase. Simply select the parameters, and then select the field to relate the parameters to.
Elapsed Timers
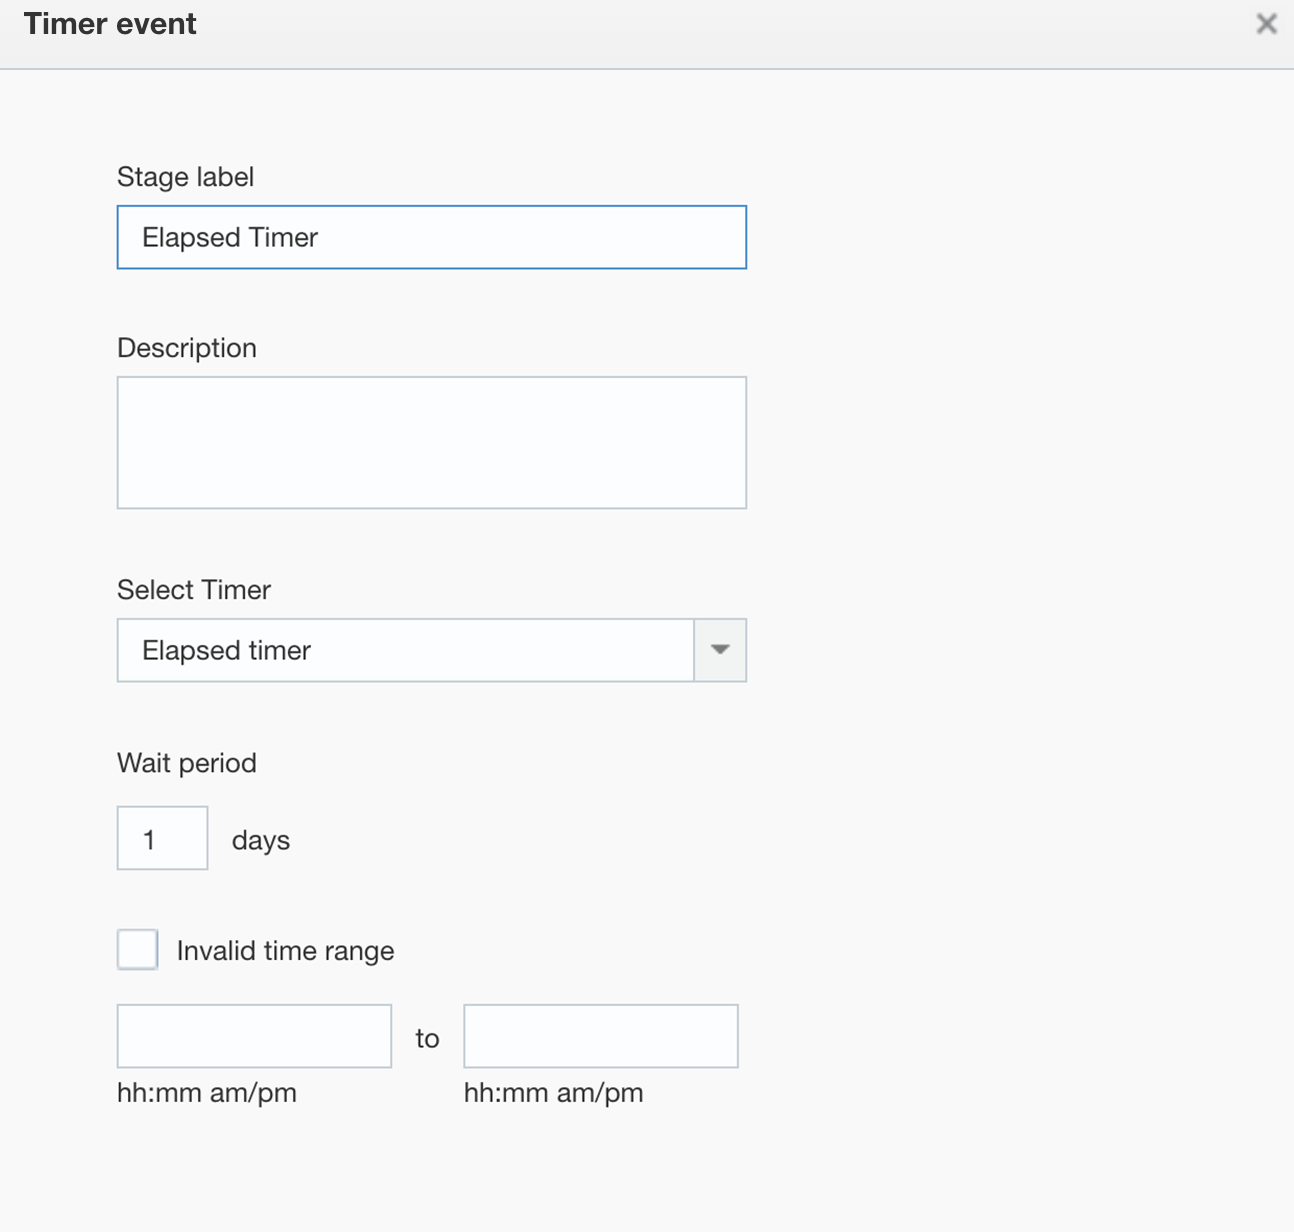
An Elapsed Timer waits for the specified number of days from entry to the step to move to the next program stage.
To use an Elapsed Timer, simply fill in the “Wait Period” with the number of days to wait. Check the “Invalid time range” box and enter the invalid hours to prevent messages from being sent during a specified time period. For example, to prevent sending SMS messages between 6 a.m. and 8 a.m.
 Event Switches as Timers
Event Switches can replace traditional timers in some use cases. They gate recipients and will only send them down a path when a specific event occurs.
To start with Event Switches, drag the icon onto the program canvas.
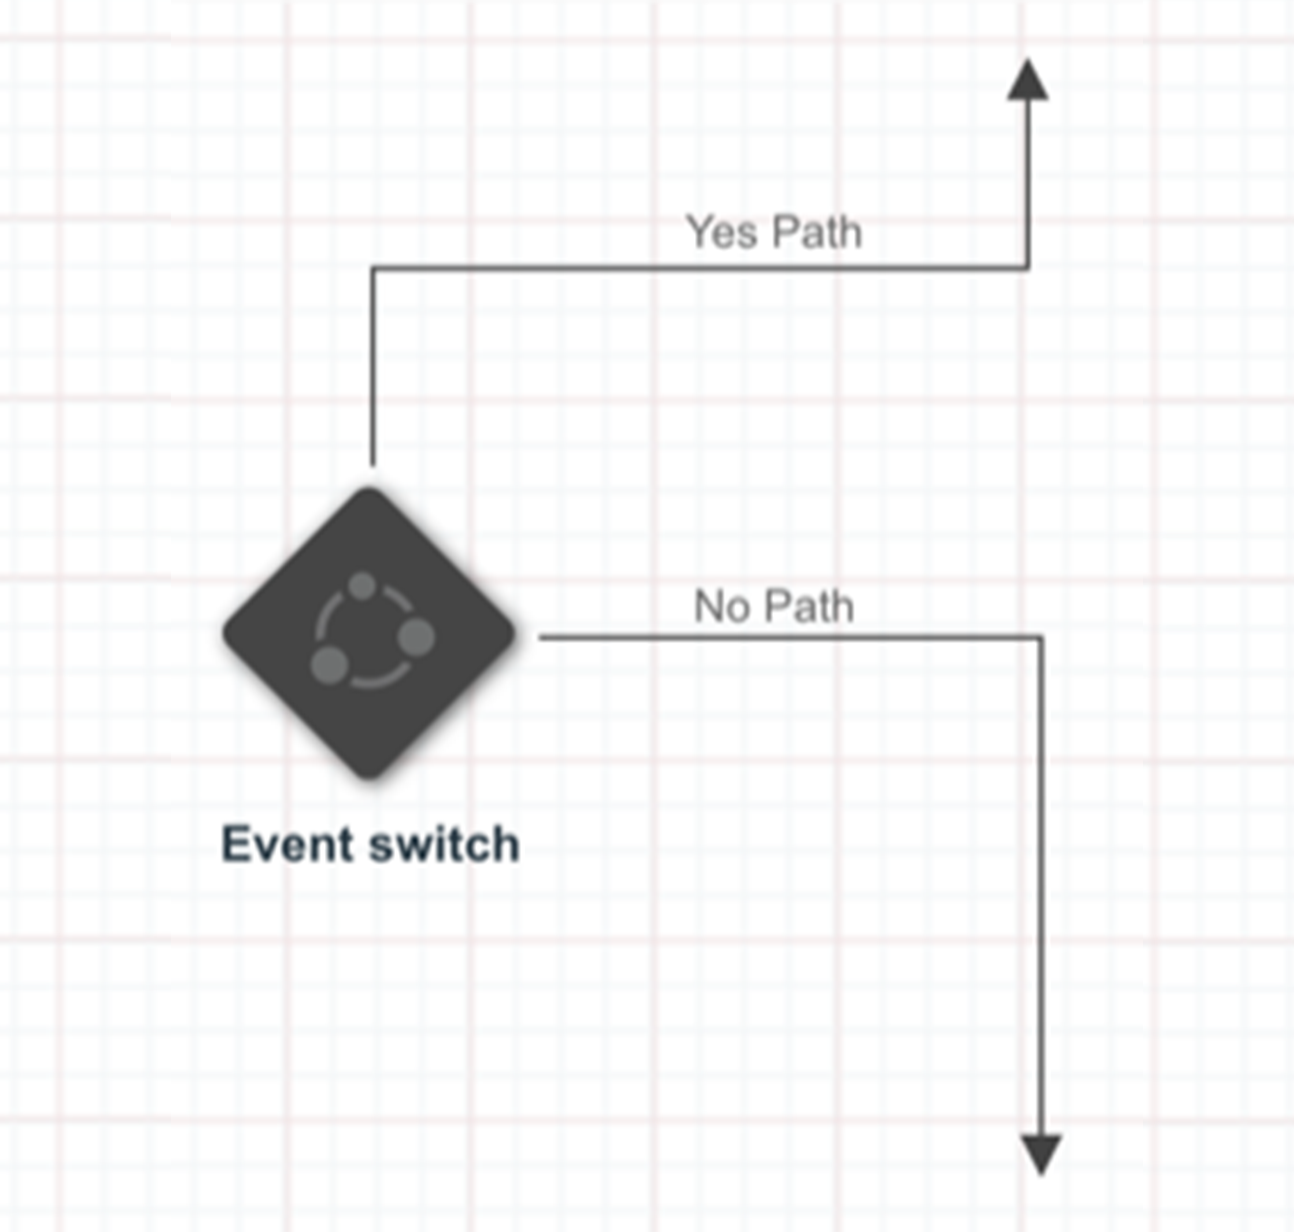 Next, you must create at least one event path and one “timeout” path by creating connectors to the next steps. The timeout path is the default – it will be used if the other specified events do no occur during the specified evaluation period.
Now you can double click the icon to open the event switch dialog box and set up your options. Start with the Timer section at the bottom to set the timing for the timeout path.
In the Events section, you can name your paths, and select the event type from the dropdown menu. Once you select an event type, a dialog box opens where you can provide event-specific details.
Event Types:
- Custom event: includes eCommerce events (abandon, purchase, etc.) and listeners
- SMS received event: select long vs short codes and fill in the relevant keywords
- Open Event: select the campaign for which opens are watched
- Click Event: select the campaign for which clicks are watched
- Conversion Event: select the campaign for which conversions are watched
- Time Out: nothing to format here, as it was all formatted in the Timer section
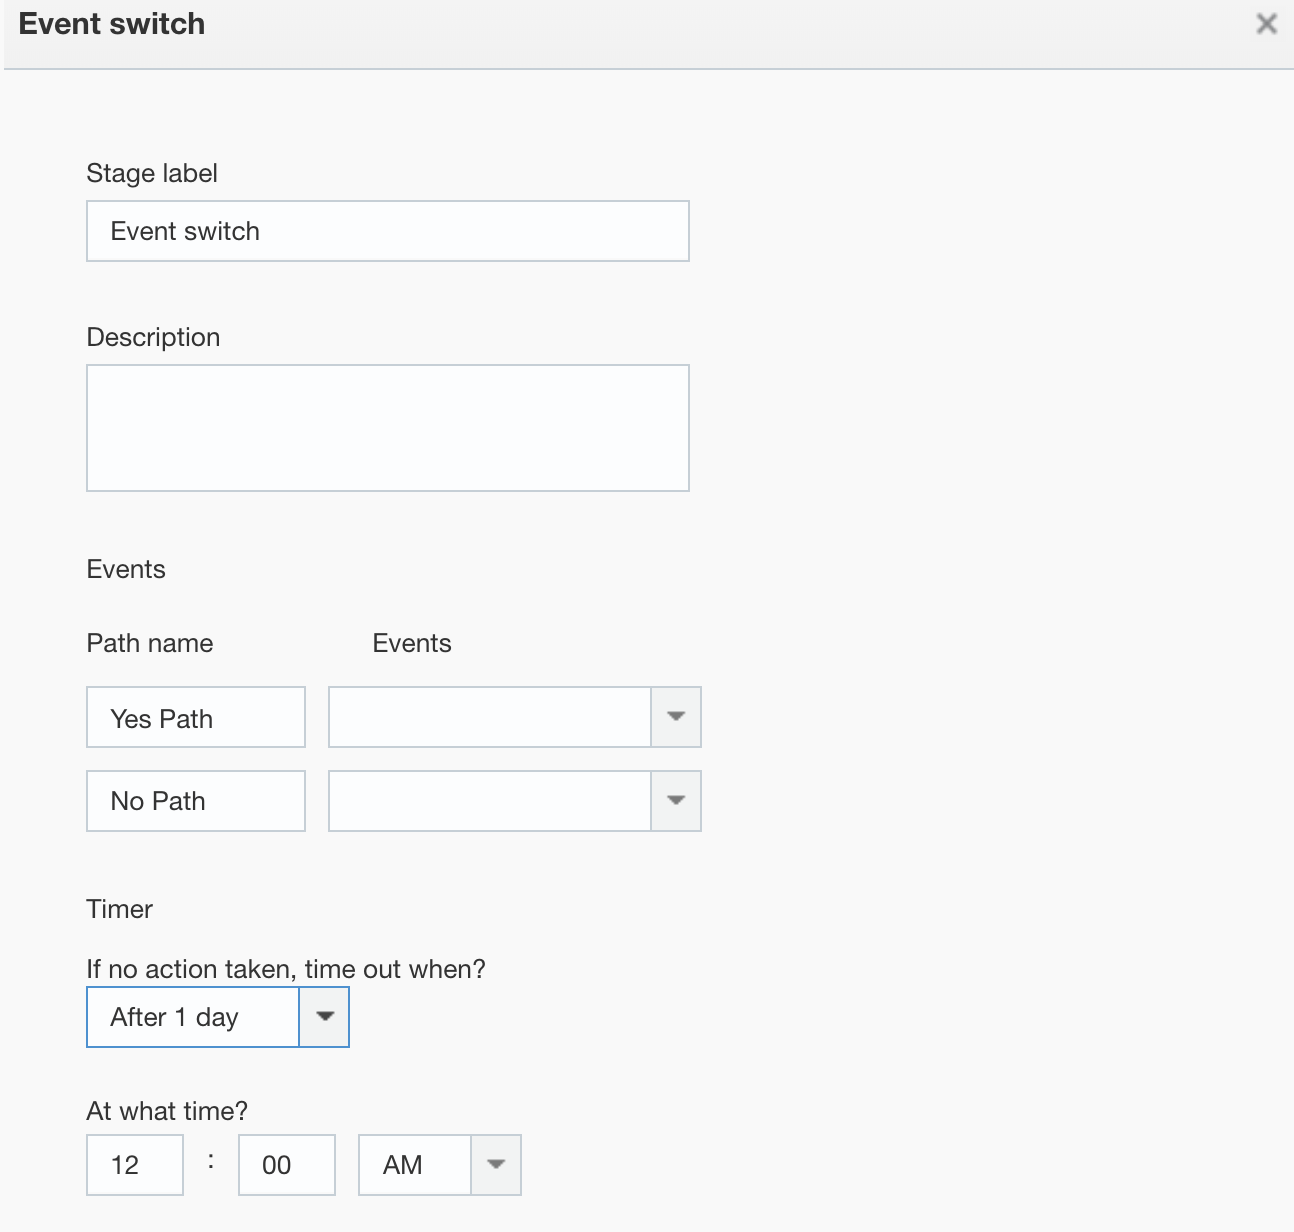 One last thing: The Timers use the default time zone of your account, so keep this in mind when setting up your programs.
With this detailed knowledge of Responsys Timers and Event Switches, you’ll now be able to customize the timing of your Responsys programs to a very fine degree. Need some help with Responsys Timers? Tegrita is here to guide you through the nuances and complexities of the Responsys program canvas. Contact us to learn more.
About the Author
Jason Semenek is a Sr. Marketing Strategy Lead at Tegrita. His career started in 2000, where he worked to introduce and help integrate Oracle Responsys for a variety of clients. He has worked in a variety of industries as a digital marketing specialist on the consultant and client side. Jason’s knowledge of marketing systems spans a wide variety of automation platforms, CRM systems, SEO/SEM, and more. His broad experience helps Jason help clients with complex strategy discussions and integrated technology implementations.
